本文共 4872 字,大约阅读时间需要 16 分钟。

gpt分区 添加vhd引导

We’ve already shown you the , but that requires tweaking your partitions. If that’s something you’re not ready for, here’s how to use a virtual hard drive (VHD) to boot Windows 8 on your Windows 7 PC.
我们已经向您展示了的 ,但这需要调整分区。 如果您还没有做好准备,请按照以下方法使用虚拟硬盘(VHD)在Windows 7 PC上启动Windows 8。
There’s a lot of different methods to do this, and we’re just going to show you the most user friendly method, using the GUI to create a blank VHD, a PowerShell script to expand the .WIM image file so we can install.
有很多不同的方法可以执行此操作,我们将向您展示最用户友好的方法,即使用GUI创建空白的VHD,使用PowerShell脚本扩展.WIM图像文件以便我们进行安装。
创建VHD (Creating The VHD)
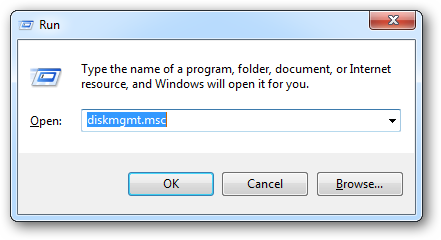
To create the VHD, go to a run prompt by pressing Win+R, and type diskmgmt.msc.
要创建VHD,请按Win + R进入运行提示符,然后键入diskmgmt.msc。
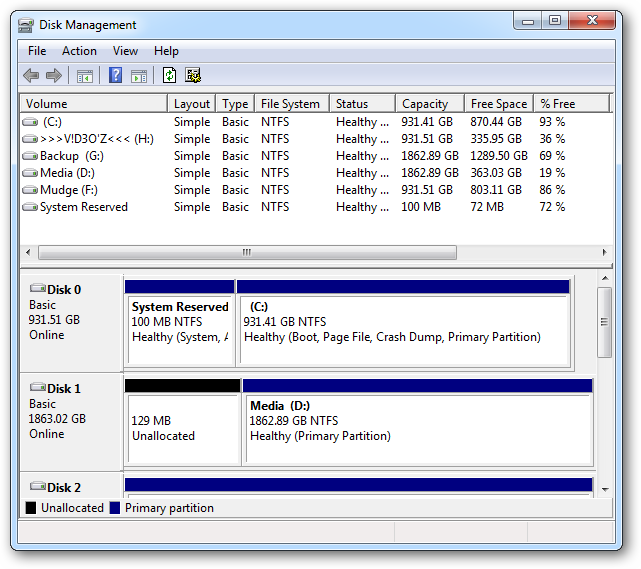
An MMC console will appear, and will have the Disk Management snap-in pre-loaded.
将出现一个MMC控制台,并将预加载“磁盘管理”管理单元。
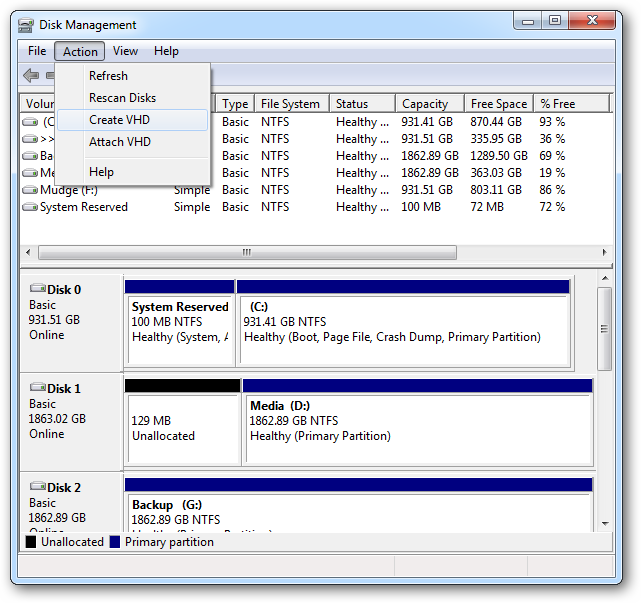
To create a new VHD, click on the action button in the menu bar, and select Create VHD.
要创建新的VHD,请单击菜单栏中的操作按钮,然后选择创建VHD。
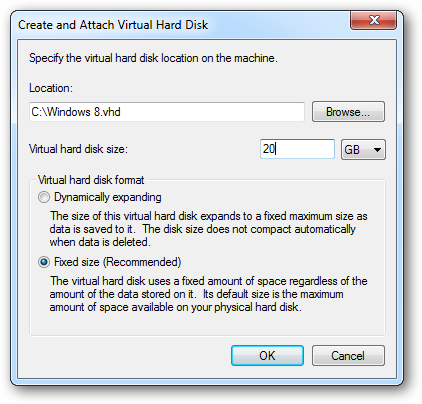
Now you need to choose a location for the VHD file and set the size, which should be no less than 20 GB. You should probably choose a fixed size for best performance.
现在,您需要为VHD文件选择一个位置并设置大小,该大小应不少于20 GB。 您可能应该选择固定大小以获得最佳性能。
Windows will then create the VHD, the progress of this can be viewed in the Status Bar of the MMC snap-in.
然后,Windows将创建VHD,可以在MMC管理单元的状态栏中查看其进度。

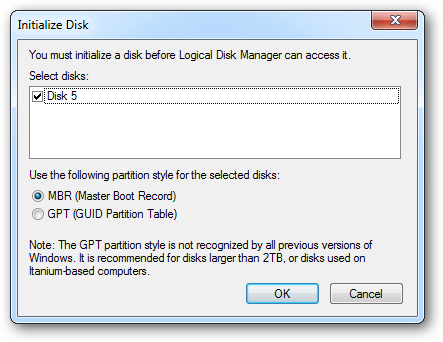
Once the disk is created it will be in the list of partitions in the Disk Management console. You’ll want to initialize the disk by clicking on it and selecting initialize.
创建磁盘后,它将在“磁盘管理”控制台的分区列表中。 您需要通过单击磁盘并选择初始化来初始化磁盘。

Leave the partition style at MBR(Master Boot Record) and click ok.
将分区样式保留在MBR(主引导记录)上,然后单击“确定”。
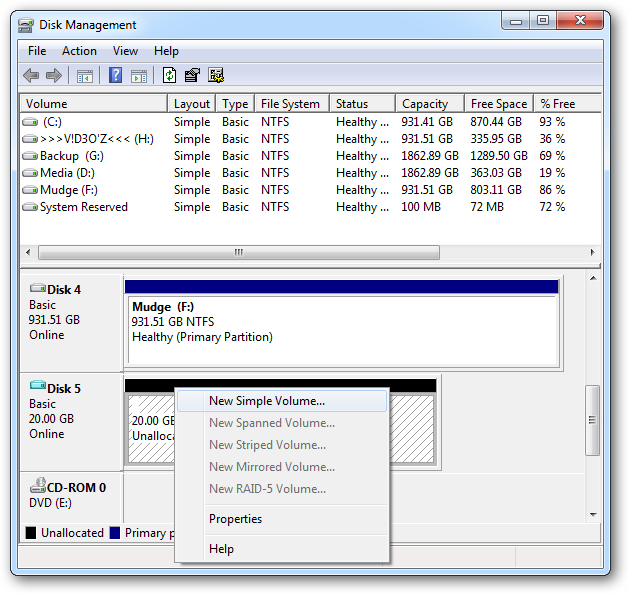
Once the disk has been given a partition style, we now need to create an actual volume on the partition. To do this right click on the black space and select “New Simple Volume”.
为磁盘指定分区样式后,我们现在需要在分区上创建实际卷。 为此,请在空白处单击鼠标右键,然后选择“新建简单卷”。
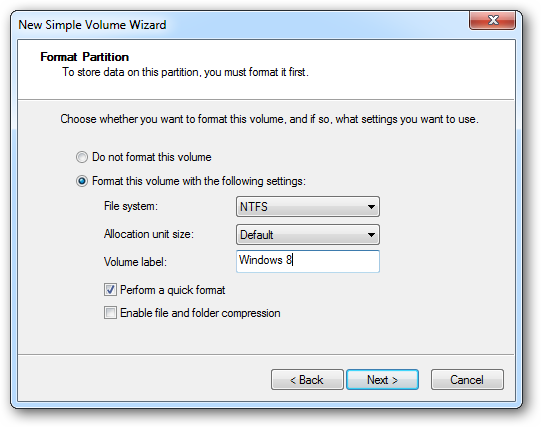
A wizard will open, you can just accept all the defaults until you get to this screen. Here change the Volume label to “Windows 8”, then click next and finish.
将打开一个向导,您可以接受所有默认设置,直到进入该屏幕。 在这里将音量标签更改为“ Windows 8”,然后单击下一步并完成。
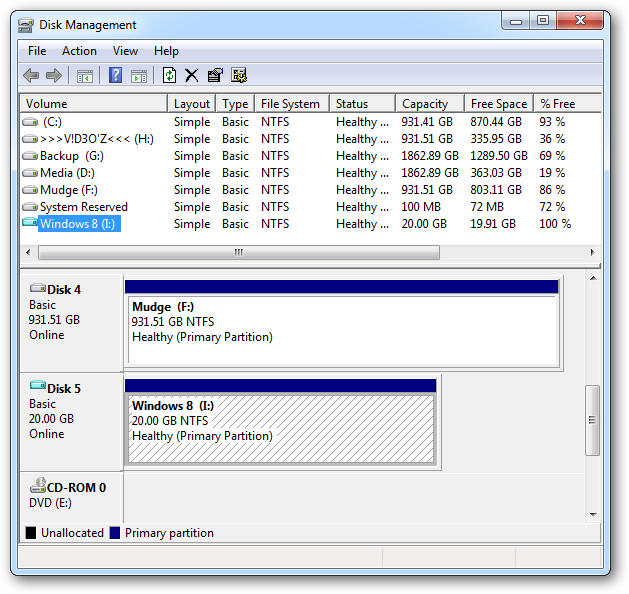
Now you have a new VHD file that is acting like a real hard drive.
现在,您有了一个新的VHD文件,其作用就像一个真正的硬盘驱动器。
 ()
()
在VHD上安装Windows 8 (Installing Windows 8 On The VHD)
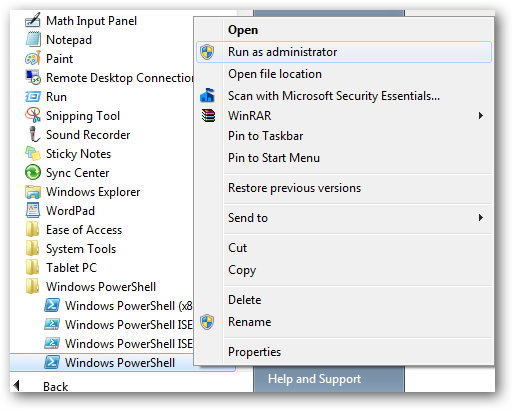
The first thing you need to do is open PowerShell as an administrator by opening Start Menu->All Programs->Accessories->Windows Powershell, right-clicking on the Windows PowerShell shortcut, and choosing Run as Administrator.
您需要做的第一件事是通过打开“开始”菜单->所有程序->附件-> Windows Powershell,以管理员身份打开PowerShell,右键单击Windows PowerShell快捷方式,然后选择以管理员身份运行。
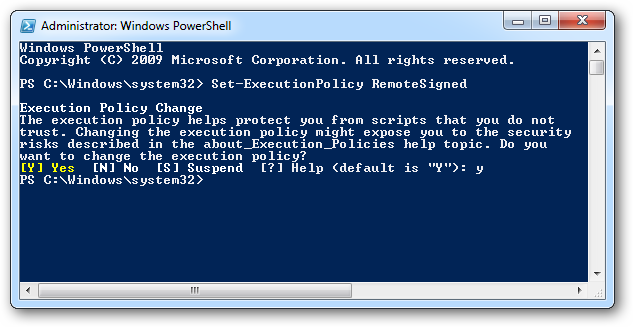
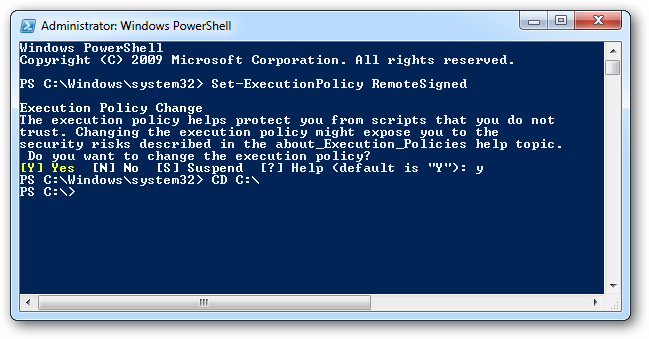
When PowerShell launches you will need to change the execution policy to allow you to run scripts. To do this, you need to type “Set-ExecutionPolicy RemoteSigned”. You will be given a security notice just type “Y” and press enter to accept. Once you have done this, leave the PowerShell window open as we will be using it again just now.
在PowerShell启动时,您需要更改执行策略以允许您运行脚本。 为此,您需要键入“ Set-ExecutionPolicy RemoteSigned”。 只需键入“ Y”,然后按Enter键,您将收到安全通知。 完成此操作后,将PowerShell窗口保持打开状态,因为我们现在将再次使用它。
Next you need to download this script from , and then move it to the root of the C: Drive. Note that you could move it somewhere else if you want, but just change the rest of the instructions to use the alternate path.
接下来,您需要从下载此脚本,然后将其移至C:驱动器的根目录。 请注意,您可以根据需要将其移动到其他位置,但只需更改其余说明以使用备用路径即可。

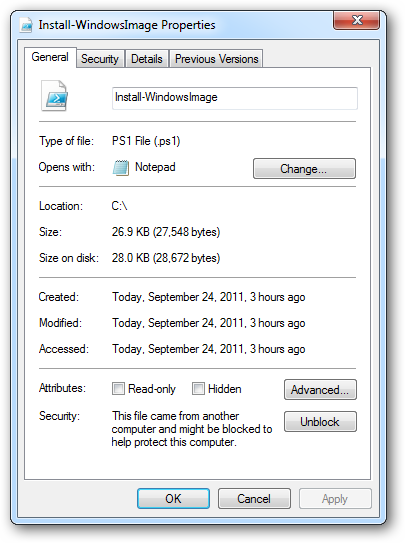
Right-click on the file and select properties. Click the unblock button in the bottom right hand corner.
右键单击该文件,然后选择属性。 单击右下角的取消阻止按钮。
Now you will need to mount the the .ISO file that you downloaded from the Windows Developer website. If you don’t know how to mount an ISO file . Once you have mounted the .ISO image switch back to the PowerShell window. Now type “CD C:\” to switch to the root of the drive.
现在,您将需要挂载从Windows Developer网站下载的.ISO文件。 如果您不知道如何挂载ISO文件, 。 安装.ISO映像后,请切换回PowerShell窗口。 现在,键入“ CD C:\”以切换到驱动器的根目录。
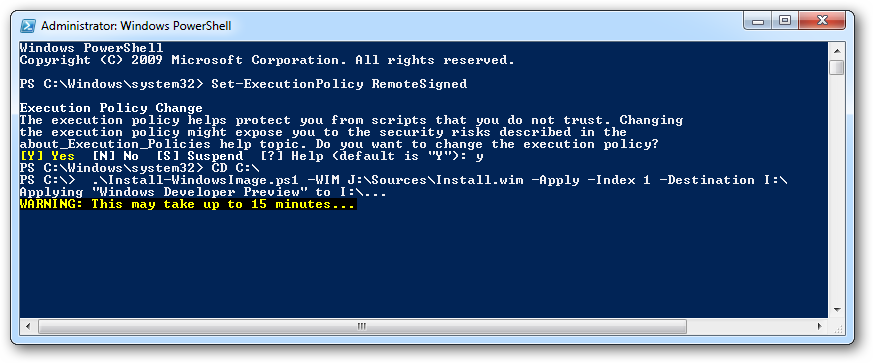
Now type the following command into the shell window:
现在,在shell窗口中键入以下命令:
.\Install-WindowsImage.ps1 –WIM J:\Sources\Install.wim –Apply –Index 1 –Destination I:\
。\ Install-WindowsImage.ps1 –WIM J:\ Sources \ Install.wim –应用–索引1 –目标I:\
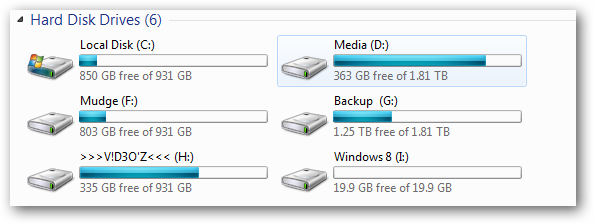
You should substitute the drive letter that comes after the –WIM for the drive of the mounted DVD image, and substitute the destination drive letter, in our case this is I:\, for the VHD that you created in the first section of this article. Then press enter.
您应该将–WIM后面的驱动器号替换为已安装DVD映像的驱动器,并将目标驱动器号替换为本文中第一部分创建的VHD,在本例中为I:\。 。 然后按Enter。
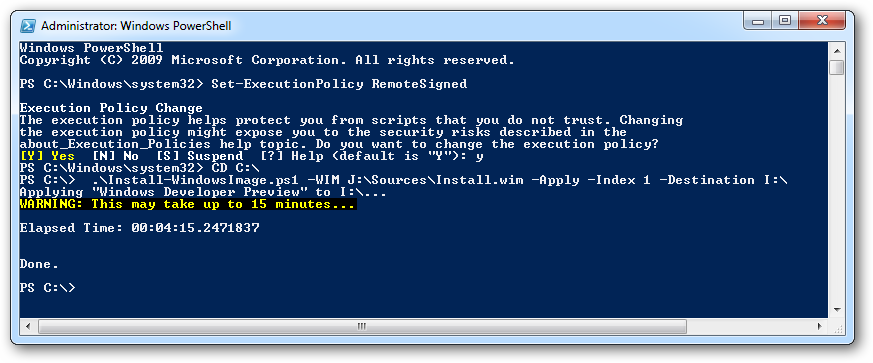
Once it has completed you will be notified.
完成后,您将收到通知。
Now open an elevated command prompt, and type bcdboot.exe I:\Windows (assuming that I:\ is the drive with Windows 8 on it).
现在打开提升的命令提示符,然后键入bcdboot.exe I:\ Windows(假设I:\是装有Windows 8的驱动器)。

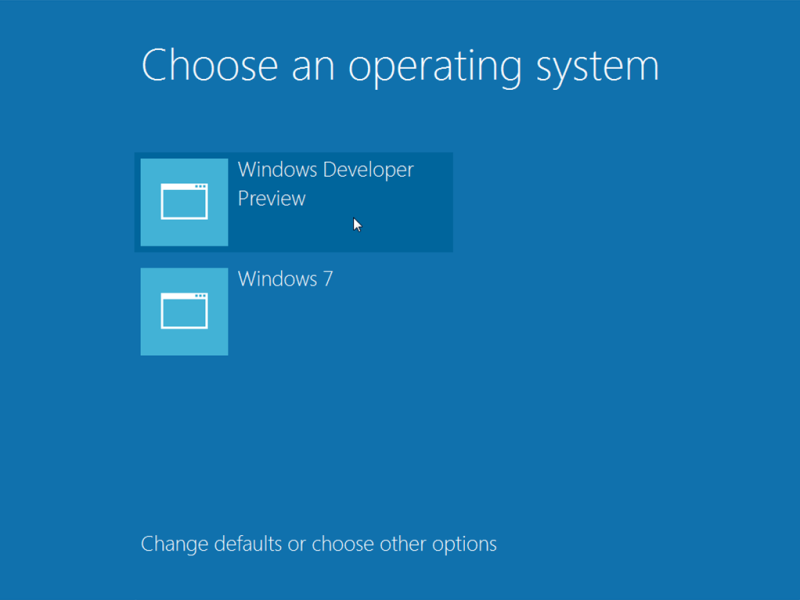
That’s it now when you boot Windows you will be greeted with the new OS Choosing Screen.
就是这样,当您启动Windows时,将会看到新的OS选择屏幕。
翻译自:
gpt分区 添加vhd引导
转载地址:http://spkwd.baihongyu.com/